RIP is a distance vector protocol meaning that it uses only hop counts to determine the best way to a remote network. By default, a maximum of 15 hops are made to the destination network, on the 16th hop the network is identified as unreachable. In order to configure routing we use router and network commands.
There are two versions of RIP. Version 1 does not support classless routing, which means that it does not support subnets; so all the devices in the network should be from the same network. However, RIP version 2 supports classless routing.
Let us consider the following network and assume that the ip address for the interfaces has been assigned. Let us see how to configure RIP
Router A(config)#router rip
Router A(config-router)#network 192.168.10.0
Router A(config-router)#network 192.168.20.0
Router A(config-router)#^Z
Router A#
Router B(config)#router rip
Router B(config-router)#network 192.168.20.0
Router B(config-router)#network 192.168.30.0
Router B(config-router)#network 192.168.40.0
Router B(config-router)#^Z
Router B#
Router C(config)#router rip
Router C(config-router)#network 192.168.40.0
Router C(config-router)#network 192.168.50.0
Router C(config-router)#^Z
Router C#
The ‘show ip route’ command will give you the details of the routing
Router A#sh ip route
R 192.168.50.0 [120/2] via 192.168.20.2, 00:00:23, Serial0/0
R 192.168.40.0 [120/1] via 192.168.20.2, 00:00:23, Serial0/0
R 192.168.30.0 [120/1] via 192.168.20.2, 00:00:23, Serial0/0
C 192.168.20.0 is directly connected, Serial0/0
C 192.168.10.0 is directly connected, FastEthernet0/0
Router A#
Router B#sh ip route
R 192.168.50.0 [120/1] via 172.16.40.2, 00:00:11, Serial0/1
C 192.168.40.0 is directly connected, Serial0/1
C 192.168.30.0 is directly connected, FastEthernet0/0
C 192.168.20.0 is directly connected, Serial0/0
R 192.168.10.0 [120/1] via 172.16.20.1, 00:00:21, Serial0/0
Router B#
Router C#sh ip route
C 192.168.50.0 is directly connected, FastEthernet0/0
C 192.168.40.0 is directly connected, Serial0/0
R 192.168.30.0 [120/1] via 192.168.40.1, 00:00:04, Serial0/0
R 192.168.20.0 [120/1] via 192.168.40.1, 00:00:26, Serial0/0
R 192.168.10.0 [120/2] via 192.168.40.1, 00:00:04, Serial0/0
Router C#
In the above ‘show ip route’ result, C represent directly connected while R represents network added dynamically through RIP. [120/1] represents the administrative distance and metric. For directly connected network administrative distance is 1 and for RIP it is 120. The metric shows the number of hop; each time the packet goes though a router to reach the destination, one hop is added. If the destination network is not reached within 16 hops, destination unreachable message is given.
Even though RIP is simple and easy to configure, the disadvantage is that the routing table is broadcasted every 30 seconds by the routers, so there is a big wastage of bandwidth. Also the default hop count is 16; therefore it cannot be used in large networks.
To configure RIP version 2 is easy in case of Variable Length Subnet Masked networks
Router C(config)#router rip
Router C (config-router)#network 192.168.40.0
Router C (config-router)#network 192.168.50.0
Router C (config-router)#version 2
Routing Information Protocol (RIP)
~ Tags ~
RIP,
Routing Protocols
Static Routing
Static routing is a straight forward process. If you want packets to be routed between two routers, update each router’s routing table with the network address of the other router as well as the path to get there
This is how it is done,
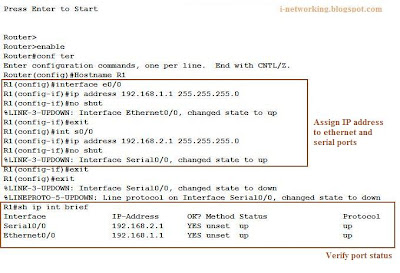
- Name the routers and give the Ethernet and Serial ports desired IP address
- When you give IP addresses, make sure the serial link that connects both the router are in same network
- Add the destination network to each router’s routing table using the add route command in the Global config mode.
Let’s configure static routing in the network shown below,

- Assign IP address to the Ethernet and Serial ports of the first router R1

- Set the clock rate to 64000 at the serial port of DCE - Data Communication End. When two routers are connected in a network, one acts as the DCE and the other as a DTE – Data Termination End

.
Now add the destination network to the routing table and check whether it is connected serially using show ip route command

- The same procedure is done on the second router. Once this is done, you can ping all the ports successfully
~ Tags ~
Routing Protocols
Subscribe to:
Posts (Atom)
